- Getting Started
- Code Review
- Platforms
- Agentic Coding
- Configuration
- CI integrations
- Design Tools
- Developer Tools
- Web Projects
- Get Notified
- API
- Single Sign On
- Self-host
Getting Started
- Getting Started
- Code Review
- Platforms
- Agentic Coding
- Configuration
- CI integrations
- Design Tools
- Developer Tools
- Web Projects
- Get Notified
- API
- Single Sign On
- Self-host
Getting Started
Comparing Images
When Screenshotbot detects UI changes on your Pull Request, it automatically creates a report of the changes and posts it your Pull Request.
A report might look something like this:
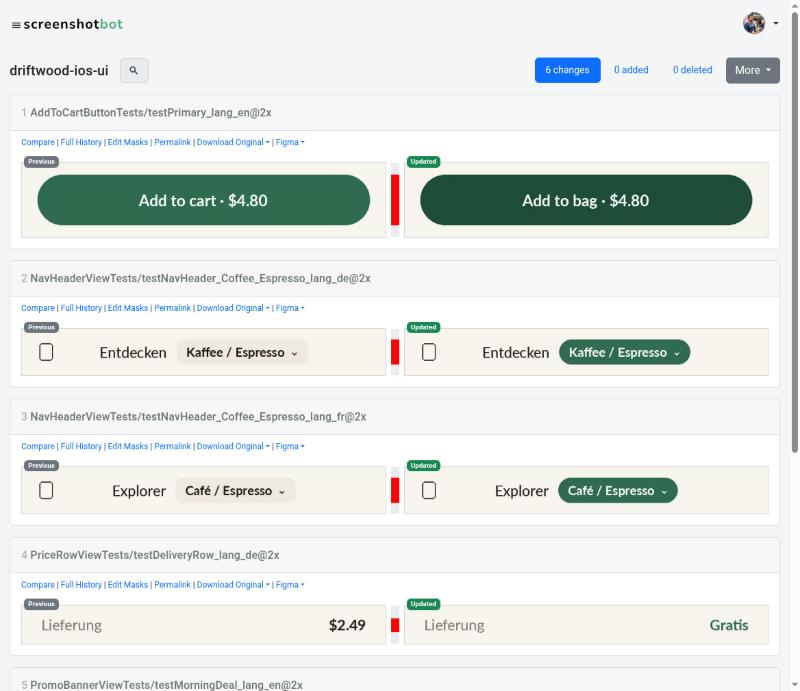
Sometimes it’s hard to tell how the screenshots changed at first glance. Screenshotbot provides sophisticated image comparison tools that are intuitive for developers to use.
The Hover Tool
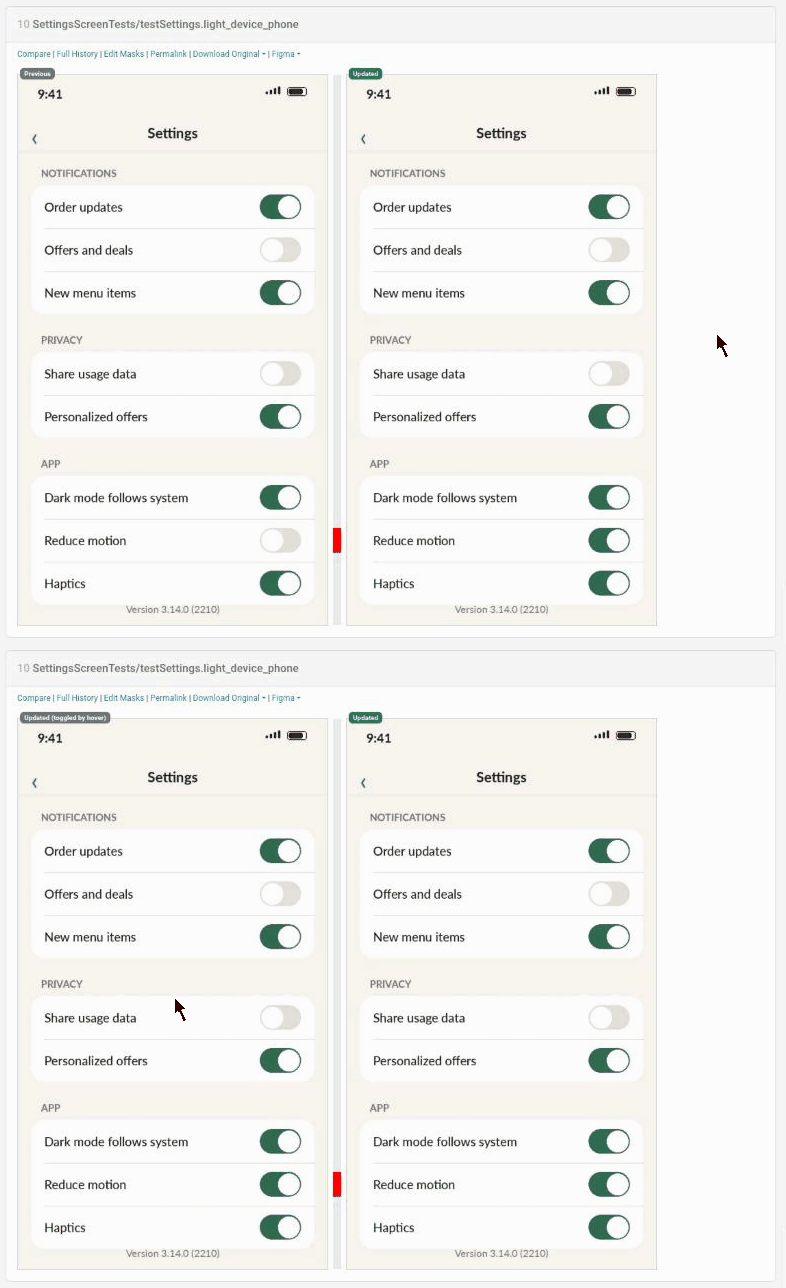
As a first pass, you can hover in and out of the image on the left. While you hover, it shows the updated screenshot in place of the previous one (its label changes to “Updated (toggled by hover)”). For most of your reports, this will immediately tell you what the change is. This is probably the easiest way to scan through a report with a large number of changes.
The Changed-Rows Strip
Between the previous and the updated screenshot, Screenshotbot shows a thin strip that marks every row of pixels that changed in red. The strip lines up with the screenshots, so you can see at a glance where to look, even when the change is a few pixels in a tall screenshot.
In the example below, the strip points straight at the Delivery and Total rows:
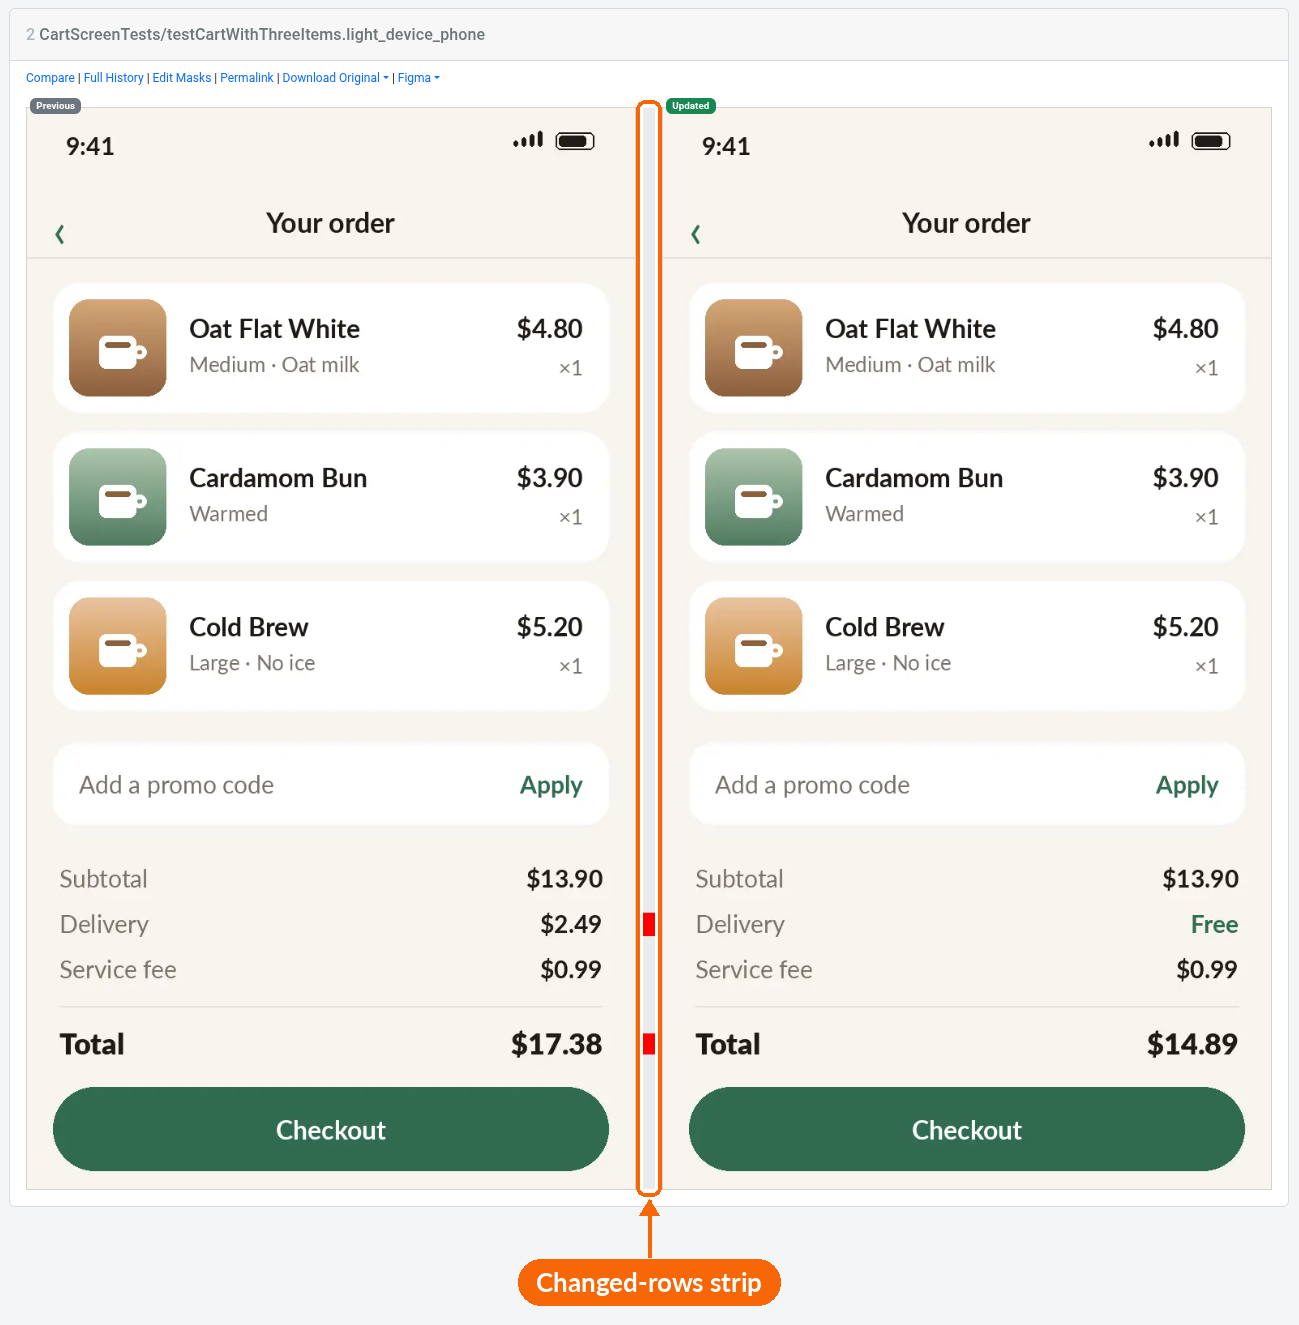
Clicking the strip opens the Compare tool for that screenshot.
The strip is computed in the background. If you open a report before its screenshots have been compared, you’ll see an arrow between the screenshots at first, and the strip replaces it once it’s ready.
The Compare Tool
Sometimes, the changes are very subtle and it’s hard to see with the human eye. In these cases you can use the Compare link, or click the changed-rows strip. The compare tool will show the modified pixels in red. If you still can’t tell (which can happen if the image is big and zoomed out on your screen), you can click the Zoom to change button, which will animate to a randomly selected pixel change.
Up Next
Screenshotbot lets you both Review and Rewind. Read about the History tool.